Wednesday, 4 January 2012

Smoothie Breakfast

I am trying to follow some of the advice of Peas and Thank you using her Pealightful-Plan.  This is based on the smoothie from the breakfast plan.  Now, you have to excuse the colour since it looks a little green but that might be the spinach.  There are a few new additions to my normal smoothie mix.  I usually use fresh banana, frozen fruit and milk, but this time I added just frozen bananas, unsweetened almond milk, fresh spinach, raw oatmeal, natural peanut butter,  and cocoa powder.  It was delicious, although I decided to add another 1/4 c of oatmeal next time I will try to add it all at the beginning to make sure that it is ground finer then it was.  I was amazed by the smoothie, it was delicious.  I was doing a banana, chocolate, peanut butter flavour and it as thick and delicious.

Good Morning Smoothie

1 cup Unsweetened Almond Milk
1-2 cup Frozen Banana
2 tbsp Cocoa Powder
1-2 tbsp Natural Peanut Butter
1-2 handfuls Spinach
1/4-1/2 cup Old Fashioned Oats

1 Place all the ingredients in the blender and wizz it up until it is all blended together and smooth.  

2 Place in a glass and Enjoy!


Yogurt Time

I came across a post about whether you should bother buying a yogurt making or if it is just something to take up counter space.  And this lead me to 3 articles about making yogurt at home without buying a unitasker.  My favourite article was by Harold McGee, know for his food science book "On Food and Cooking: The Science and Lore of the Kitchen" which is a great book if you want to know why cooking works the way it does and why ingredients change they way they do when cooking.


The yogurt making process is rather simple and I can see why you don't need a yogurt maker to make it.


Making Yogurt


You can use almost any type of milk to make yogurt, although skim milk makes a thin and a little grainy yogurt.  I would suggest using whole or 2% milk to start and if you want try 1% or skim milk. You can always add a package of gelatin to the warmed milk to make a firmer yogurt.


1 For every liter of milk your cooking you'll need 2 tbsp of yogurt, either from a previous batch or from commercially produced yogurt (preferably, live culture and plain.  You could probably use flavoured as well, I haven't so I don't really know). 1a) Start by taking out your yogurt (I used approximately 2 tbsp for every liter of milk) and let it come to room temp on the counter while you do all the other stuff.  Cold buggies don't do a lot, but warm ones are great for making yogurt. 1b) Also, turn on your oven light to warm up the oven just a bit.


2 heating milk in a sauce pan on low to 180-190 degrees F.  There is where a digital thermometer is very helpful (and even butter when you turn the alarm on, but I'll get back to that later.


3 Once the milk has been heat to 180 or so, then let the milk cool to 110F.


4 Then add your room temp yogurt and mix with a whisk to get everything mixed well and then pour into a warmed glass jar, cover and wrap with a towel.


5 Place in the oven, wrapped in the towel, and let sit for 6-10 hours.  The amount of time that is required to culture the yogurt depends on how you like your yogurt.  I let mine sit for 6 hours this time which leaves the yogurt mellower and thinner.  Essentially the shorter the time the yogurt is left to mature the mellower and thinner the resulting product.  The longer the time you leave it the tangier and thicker the product.  It will also get tangier in the refrigerator since there aren't any of the commercial preservatives or stabilizers.


Here is my new additions.  Yogurt and a new Weck Tulip 1L jar.  I have been ogling Weck jars for years but they aren't available locally but I did find a place in Vancouver that were selling them, so I picked up 2 - 1L jars. 

I had a taste of it to make sure that it was good, and it was.  That liquid is the whey that always comes out when you disturb the protein strands.

Final Notes:
~I got a migraine in the middle of the process of heating the yogurt and I hadn't turned on the temp alarm on my digital thermometer, so I didn't catch it until it made it to 215F, I let it cool to 110F and followed the rest of the directions.  Still tasty and yogurty :)

~If you like greek yogurt, then once the yogurt has set, spoon the yogurt into a fine mesh strainer or a strainer lined with cheese cloth over a bowl and let all that drain in the fridge overnight or until it is as thick as you like.  The whey is yellow-green liquid in the bowl which is full of riboflavin and is apparently a nice drink with a bit of sugar or salt.

~If you want fruit flavoured or honey yogurt, you can blend up some fruit and mix it in the yogurt once it has cultured in the oven.  I haven't tried this but I think I might try some honey yogurt since this is the kids favorite.  I might also try adding the honey to the warm milk rather then to the cultured yogurt, but I don't know if that will work as well as I want it too, I guess I will have to try :)

~If your interested in using a slow-cooker then try this article.  I haven't tried it but it looks interesting.

Sunday, 1 January 2012

Turkey Cranberry New Years' Risotto

We are up a Whistler again this year for New Years.  It has been a rather low key affair since some of our regular attendees were unable to come up with us this year so it has been much quieter and I have only visited the hot tub once the whole trip, it has been a bit weird.


I was sort of in charge of dinner last night.  We had left over turkey in the freezer and we had already made stock from the bones, so I decided to do a risotto. I had picked up some arborio rice but I magically forgot the other key ingredient : Parmesan.  I usually use a risotto and rice cookbook for the base recipe but this time I picked a Jamie Oliver recipe but since I didn't have a scale I had to guess at the amount of rice and wine :)  The plan was to make a turkey cranberry risotto and it turned out beautifully especially topped with left over cranberry sauce. 


Turkey and Cranberry Risotto


1 large Onion, finely diced
4 cloves Garlic, finely diced
2 tbsp Butter
1 tbsp Olive Oil
1 stalk Celery, finely diced
1 Carrot, finely diced
2 cups Arborio Rice
2 wine glasses of White Wine (approximately 8oz or 1 cup of wine)
approximately 8 cups of Turkey Stock 
1/3 cup Dried Cranberries
3-4 cups left over Turkey, diced
2 tbsp butter
Salt
Pepper
Cranberry Sauce (to serve with the risotto)
1/2 -1 cup parmesan (optional, we didn't have any and it as still really delicious)


1Prepare all veggies and bring stock up to a simmer before starting the cooking process.  Add the dried cranberries to the stock to rehydrate (Add them into the risotto with the stock)


2In a large skillet heat heat 2 tbsp butter and Oil. Saute onion, garlic, carrots and celery until translucent.  Add rice and saute until translucent (Approx. 3-5 minutes).


3 Deglaze pan with the wine and stir until the wine is almost soaked into the rice (1-2 minutes) then add approximately 1 cup of stock and let that absorb into the rice. Once that is almost gone add more stock a ladle full at a time and waiting for the stock to be mostly absorbed before adding more. Stirring frequently.


4 Once the rice has started to plump up, keep testing the rice to see if it getting tender.  You know your almost done when the rice is cooked.  Add the turkey and stir to heat through and then remove from heat and add 2 tbsp of butter and stir through, cover and let sit for a few minutes.  If using parmesan, then add with the butter, cover and let sit for a few minutes.


5 Enjoy!

Friday, 30 December 2011

Another Butternut Squash Lasagna

I decide to tackle that Roasted Butternut Squash and Yam Lasagna and my version of it which I had added spinach and ricotta.  I found the original tasty but really oily so I decided to take another attempt at it again but change it up to try to make it a bit healthier and much less greasy.
Here is the last piece of the lasagna, I didn't get any pictures of the process or any other part of the lasagna.

This recipe is sweet and rich tasting but not greasy.

Lovely sage on the top.  I decided to add some sage to the filling as well since it needed to add more then decoration.


Roast Butternut Squash and Yam Lasagna
Adapted from: How Sweet It Is

6-9 oven ready Lasagna Noodles or Fresh Lasagna Noodles
Medium Butternut Squash
2 Medium Yam
1/4 tsp Nutmeg
Olive Oil
3 tbsp Butter
4-5 small Shallots, finely chopped
3-4 Garlic Cloves, finely chopped
6 Sage Leaves, finely diced
9-12 Sage Leaves, left whole
6 oz Mascarpone Cheese
6 oz Light Cream Cheese
1 cup Parmesan, grated
1 1/2 cup shredded Mozzarella
Salt and Pepper to taste

1 Preheat oven to 350.

2 Peel and cube the butternut squash and the yam.  Line the baking sheet with parchment and lay the cubed squash on the baking sheet.  Drizzle with a bit of olive oil and season with nutmeg, salt and pepper, then roast for 30-45 minutes or until the squash has is soft and starting to caramelize then remove from the oven and let cool.  Once cool, mash up the squash up (I like it a bit chunky)

3 In a small frying pan heated to medium, heat the butter and saute the shallots, garlic and sage until they are tender and translucent and then remove from the heat and let cool 5-10 minutes.

4 In a bowl add shallot, mascarpone, cream cheese, parmesan, salt and pepper (to taste).

5 Now it is time to put everything together.  In a buttered 8"x8" glass baking dish, lay a layer of noodles and top with half of the squash mash and then smooth out the top.  Top that with half of the cheese mixture and then slightly less then half the mozzarella.  Then another layer of noodles, then the last of the squash and the last of the cheese mixture.  Top that with the remaining mozzarella and the sage leaves.

6 Bake at 350 for 45 minutes or until bubbly and golden.

7 Enjoy!

Monday, 19 December 2011

Kickass Corn Bread

I love my corn bread.


I mean, I loooooooove my cornbread!!!


There is only one problem with it, that it doesn't last, at all. It is usually gone rather quickly and if there are any leftover, it just isn't the same the next day. This cornbread is a little different then most cornbreads. It doesn't contain any flour and thusly is pure deliciousness.

Johnny Cake
1 cup Cornmeal (Yellow or White)
1 tsp Baking Powder
1/2 tsp Baking Soda
1/2 tsp Salt
2 Eggs
1 cup Cream Style Corn (I use the small can, 10fl oz)
1/4 cup Veggie Oil
1 cup Sour Cream

~Preheat oven to 400.
~Stir together all the dry ingredients in a 8"x8" square pan.
~Add eggs, cream-style corn, oil and sour cream and stir until combined.
~Bake for 25 minutes or until browned.

Enjoy!


Start with a 8"x8" pan, grease it (although I neglected to do that here)

I like to mix everything in one pan, to save on dishes.

Here are all the dry ingredients.

Here are all the ingredients in the pan.

All mixed up.

I love this cornbread so much that I didn't get a chance to get the camera out before it was devoured.


It has been THAT kind of day!

This has been a very craptastic day so far, and it hasn't really begun to get better.   The kids have colds and are thusly terribly whiny and terribly frustrating to deal with, so, I decided to kick the sugar away from them for a few days (which is sooooo easy at this time of year) and so they had a choice of eggs, sausage or oatmeal.  Rosie happily had an egg but Ladybug melted down with the suggestions and then it went down hill from there. Eventually she decided on sausages and then happily ate almost 3 1/2 sausages.  Then it was Rosie's turn to meltdown, poor kid lost her Playmobil Advent Calendar for 2 days.  Luckily my Mom was over so when I lost it, she took over.

On top of allllllll of that, I spilled scalding milk on my foot and all over the floor and then spread ground coffee everywhere and then as I was trying to use my lovely Aeropress and I had coffee grinds stuck in the threads and mess followed.  My day did not start well.

On a some what better note, I had decided to make baked beans that I saw on Seriouseats.com and decided that since we have friends over most Mondays, I should make something nice to eat.  If it turns out horribly we can always get pizza which is the standard unless I make some sort of awesomeness. 


You start out by simmering the beans.  It is best if you get them tender since they don't have a lot of liquid soak up to make them even softer.


Diced onions.

And then they meet the cooked beans.

Line the dutch oven with the bacon.

Place half of the beans into the pan and then place the ham hock in the pan and cover with the remaining beans.

Here is the beans, sauce, and ham hock all together.

Doesn't that look delicious.


Maple Baked Beans
From Serious Eats

2 cups dried Navy Beans
6 strips Bacon
1 Onion chopped
1 tsp Dried Mustard Powder
1 tsp Salt
1/2 cup Maple Syrup
1 Pork Hock, Fresh or Smoked
2 tbsp Butter
2 tbsp Brown Sugar


~Preheat oven to 325
~Simmer beans for 20-30 minutes until tender.  Drain beans and reserve cooking liquid.
~Line bean pot or dutch oven with stripes of bacon.
~In a large bowl toss together onions and bean.
~Place half of the bean mixture in the pot, place the ham hock and then cover with remaining beans.
~Mix together 2 cups of the cooking liquid with mustard, salt, and maple syrup.  Pour over the beans, cover and place in oven for 3 hours, or until the pork hock is fully cooked and pulling away from the bone.  Add more cooking liquid if the beans are looking dry.
~Once the ham hock is cooked, pull the beans out of the oven.  Blend butter and brown sugar and sprinkle over the top of the beans and place back in the oven with the lid off for an additional 30 minutes.

Thursday, 15 December 2011

Sick Day and Mug O'Cake

Ladybug had a fever this morning and is currently resting on the kitchen bench, poor kid.  My mum had come over to watch her so I could volunteer at her school, which unfortunately she missed out on.   There were only 4 girls in class today since illness has taken out half the class.

As a appropriate way to keep the cold bug away from me, I decide to make a mug of cake.  That's right, a mug of cake.  Isn't that the worst thing you can think of, a small cake that you can cook in the microwave and have ready within 4 minutes from start to finish.


Chocolate and Caramel Mug O'Cake
Adapted from My Family Kitchen at Babble.com

4 tbsp All-Purpose Flour
2 tbsp Brown Sugar
2 tbsp White Sugar
3 tbsp Cocoa Powder
1/4 tsp Baking Powder
1/4 tsp Salt
1 Egg - beaten
1 tbsp Vegetable Oil
3 tbsp Milk
2 pieces of leftover Halloween candy, (I used a Caramilk and a Caramel candy)

~Mix all the dry ingredients and add in all the wet ingredients.
~Pour mixture in a regular coffee mug and put the candy in the middle of the batter.
~In the Microwave, cook on high for 1 min and 20 sec.  If the cake is not quite cook you can cook in 10 sec chunks until it is the cooked.  (I cooked mine for 1 min 40 sec)


All the dry ingredients are mixed in a bowl (you could use the mug but this was handy for photos.)

There isn't a lot of each ingredient so a small bowl will do.

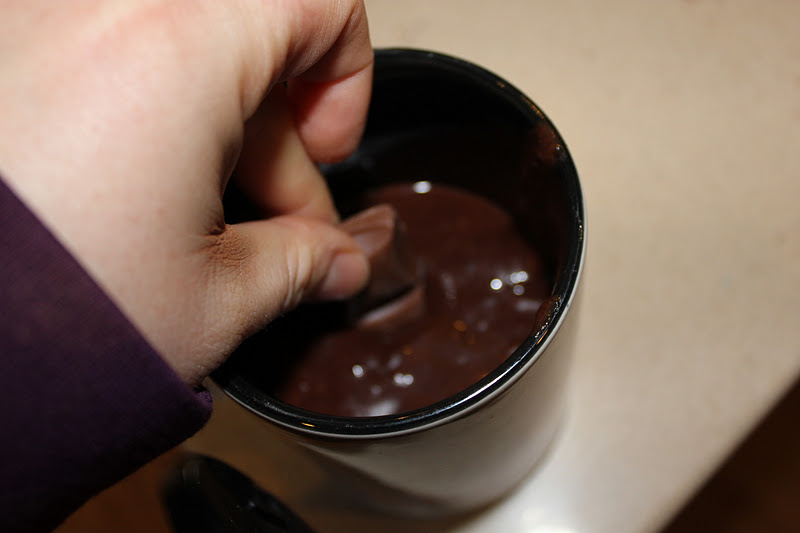
I put the combined mixture in the mug.  It is just waiting for the chocolate and caramel to be added.

Here they go.

First the Caramilk.

Then the caramel

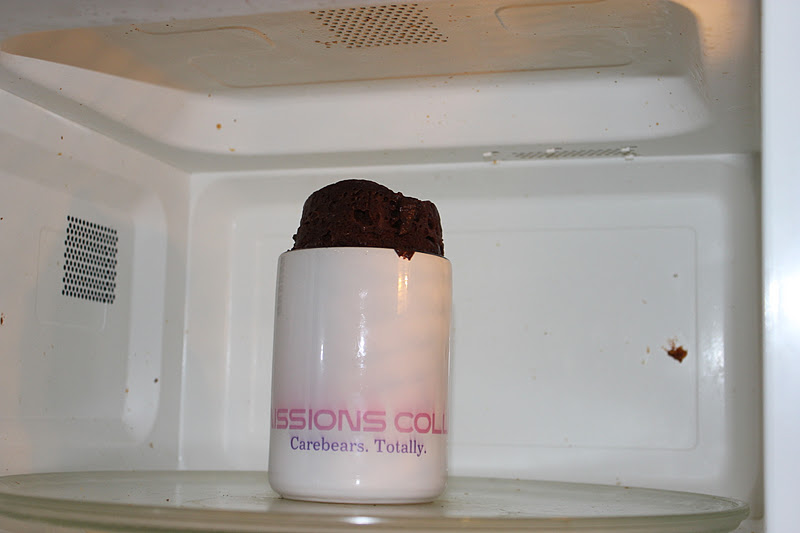
Still in the Microwave, it puffed up rather well.  I didn't get it at its full height.

Out of the Microwave and piping hot, so let it cool a bit before devouring.

Doesn't that look delicious?

 I found the treasure.

And the treasure is tasty.

Tuesday, 13 December 2011

Tuesday...

I did not manage to get my run in Monday afternoon, since Rosie decided to sleep until 5 and Ladybug has dance until 4:30 and this morning we were running super late and Rosie is asleep for pick up today, so hubby has gone to pick up Ladybug although he is now super late.  Whoops, I neglected to tell him that R is asleep, although I asked if he could pick L up from school since I thought R would fall asleep on the way home from lunch, oh well, these things happen.

Cabbage rolls for dinner plus some of the dessert and a big lunch today do not bode well for eating better.  It is just so easy to eat terribly.  I know that I will feel terrible afterwards, but that doesn't stop me from enjoying it now.

I want to feel successful and to be able to accomplish something I have set as a goal, but I seem to have a bit of blind spot for getting my act in gear.  I wish it were easier.  I remember going to weight watchers with my husband a whole bunch of years ago.  He lost all he wanted to lose in such a short time and the weight just fell off of him, I have never had that even when I was trying.

I am just not sure what I should be doing and how I will accomplish it.  I can't give up, I don't feel good in my own skin and I want to feel good about myself again.  I have had that and I want it back.  Well there is always the next meal.

I think this evening I will have some steamed veg, tofu and a bit of the brown rice left over from yesterday's cabbage rolls.

Slow Cooker Cabbage Rolls

The grocery store had heads of Savoy cabbage on for $1 each, so we picked up this gorgeous green wrinkled cabbage.  I decided that I wanted to make some cabbage rolls with it, so I searched the internet and found a bunch of different recipes and then decided to make it up as I go along and see how it turns out.

Slow Cooker Cabbage Rolls
1 1/2 lbs Lean Ground Beef
2 Eggs
2 Carrots
1 medium Onion
1/2 cup crushed tomatoes
1 tbsp Worcestershire Sauce
1 cup chunked Zucchini (about 3 inches of a medium zucchini)
2 cups cooked Brown Rice
2 tsp salt
1/2 tsp pepper
1 1/2 cups Crushed Tomatoes
1 tbsp Worcestershire Sauce
1 1/2 tsp Salt
1/2 tsp Pepper
1 1/2 tbsp Lemon Juice
Zest of one lemon
2 tsp Bragg's

~In a food processor, finely process, carrots, onions and zucchini.  If you do each individually you'll have more control of the size.
~In a bowl combine beef, eggs, finely minced carrots, zucchini and onion, salt, pepper, 1/2 cup crushed tomatoes, worcestershire sauce and brown rice.  Using you hands combine gently.
~In a pot of boiling water, cook the cabbage leaves for 3 minutes or until tender enough to roll.
~Lay out the leaves and put a spoonful or 2 about 1/4 to 1/2 a cup depending on the size of the leaves.
~Place rolled cabbage rolls in the slower cooker.
~Mix up 1 1/2 cups crushed tomatoes with the remaining ingredients and pour over cabbage rolls.  If you have 2 layers of rolls then add some sauce on the first layer before adding the second layer and then top the second layer with the remaining sauce.
~Cook on low for 7-9 hours.

I neglected to get any pictures since the hungry hoard of gamers devoured most of it.  I did make some dessert for the gamers but since they tasted them and thought they would come down with diabetes if they ate too much, I don't think I will pass that recipe along.  I remember them from my university days but I don't remember them being quiet so sweet.  I might try them with the natural peanut butter rather then Kraft peanut (sugar) butter.

Monday, 12 December 2011

Sinus infection has eaten me alive...

I have been really sick and tired.  I had a terrible cold that turned into a sinus infection, I could have dealt with it earlier but I kept telling myself I would get better in a couple days.  2 1/2 weeks later, I finally take myself to the doctor and get some heavy duty antibiotics, I am feeling better within 3 days.  The only problems with this whole cold thing is that I had no energy or desire to work out and my eating went to hell in a hand basket.  So here I am on the brighter side of my sinus infection feeling less then bright and rather blue.  Chocolates had become my best friend, my favorites were the Himalayan Pink Salt Peanut Butter chocolates which took me 4 days to go through the whole box and then I set on the Hedgehogs truffles.

I feel terrible about gaining weight and just terrible all around. I decided that I should try to kick myself out of the funk that I am in, so... I decided to go for a run this morning.  This was the plan from last night and I managed to keep with the plan this cold frosty morning.  I did not run as far as I had thought I would but I ran to school with Ladybug and then ran home from dropping her off.  I was slow, but I did it and I think that I will do it again this afternoon when I pick up Ladybug from school.  I need to get back into shape from my weeks of being sick and I thought a little here and there might be better then throwing myself in whole hog and getting hurt in the process. I would like to continue to get better and continue having shoulder and an upper back that doesn't hurt.

Ah, some lofty goals I have set for myself.  But I don't think they will be too hard to handle.  I will try to eat a bit more veg and a bunch less chocolates and then see what happens.