I grew up making my own Yorkshire pudds but in my old age and busy family I find that I have been making them from a packet on a fairly consistent basis. But I have been having some problems getting them un-stuck from the muffin tin, I mean I have to chisel them out. Even though I mix the mix thoroughly and preheat the muffin tin and the oil they still stick and I mean almost all of them stick, which is always a drag.
Now, one of the things I miss from our trip to the UK a couple years back is that fact that you can get frozen packages of pre-made Yorkies at every grocery store. This was great for me since we had an apartment and thusly a kitchen to heat these lovely ready made goodies. I made it my nightly dessert with a bit of Bisto gravy. Weird, but delicious. My husband had a thing for custard, so we each had our "thing" while we were there.
Here are a few hints I have picked up that I want to try:
-Mixing it in a blender to incorporate more air.
-Heating the pan for 15 minutes.
-Make sure the oil is super hot (almost at the smoke point)
-Apparently old pans are better, although my pan is old I think that it might be part of the problem.
-Letting the batter sit for an hour+, some say up to 24 hours. (This is a trick I used to use, way back when I made Yorkies from scratch, I would let it sit about an hour an get lovely yorkies.
So, when the weather cools down some since we have been at 26 deg + for the last 4 day :) I think I will be making a few batches of Yorkies.
I think the first recipe that I will try will be the equal portions theory (which is strange idea)
1 egg
1 cup milk
1 cup flour
I am not sure if that will work out as well as it sounds since I think it will be much thicker then I want my batter, but I guess I will see.
Sorry no pictures today, but since I haven't made anything yet it sort of worked out this way
Monday, 14 May 2012

Friday, 2 March 2012
Crawling out of the Dark
Wow, it has been a while. My fault, I was away in New Zealand for a week for my cousin's wedding and I have tons of pictures. But, I have been back for going on 3 weeks and have I posted my adventures, well no, I haven't.
This is just a short post to let you all know what we have been doing. Hubby and I took our second cooking class this week. We made cheese :) Totally excited to make some at home. My mother-in-law is picking up some rennet in Vancouver since there isn't really a place to get it in Vic. Mozzarella, here I come. The other cooking class that we did at the end of January was a level 1 Thai. I did learn from experimenting with Galangal that fresh or frozen are much superior to dried which isn't as flavourful as I had hoped. Apparently I have learned the my spell checker isn't familiar with Galangal as I am.
Ok spell checker here is a run down. Galangal is a rhizome and a member of the same family as ginger. While it might look like ginger, it kind of smells like a pine tree. Weird, but true.
Other adventures in cooking came up from the dinner that I made for Rosie's family birthday. Roasted Beets with orange segments, red onions picked in apple cider vinegar and goat cheese, delicious. So delicious, that I am think of making that for dinner tonight, that or roasted butternut squash lasagna. Choices, choices. Oh, or I could have grits with shrimp. Oh the choices we have to make in life.
I'll let you see what I do end up making for dinner, I think it might be tasty what ever it is :)
Ciao
This is just a short post to let you all know what we have been doing. Hubby and I took our second cooking class this week. We made cheese :) Totally excited to make some at home. My mother-in-law is picking up some rennet in Vancouver since there isn't really a place to get it in Vic. Mozzarella, here I come. The other cooking class that we did at the end of January was a level 1 Thai. I did learn from experimenting with Galangal that fresh or frozen are much superior to dried which isn't as flavourful as I had hoped. Apparently I have learned the my spell checker isn't familiar with Galangal as I am.
Ok spell checker here is a run down. Galangal is a rhizome and a member of the same family as ginger. While it might look like ginger, it kind of smells like a pine tree. Weird, but true.
Other adventures in cooking came up from the dinner that I made for Rosie's family birthday. Roasted Beets with orange segments, red onions picked in apple cider vinegar and goat cheese, delicious. So delicious, that I am think of making that for dinner tonight, that or roasted butternut squash lasagna. Choices, choices. Oh, or I could have grits with shrimp. Oh the choices we have to make in life.
I'll let you see what I do end up making for dinner, I think it might be tasty what ever it is :)
Ciao
Sunday, 22 January 2012
What to do with Left-over Beans.

My husband and I started Weight Watchers again and he has been hungry since Friday, I think it might be more psychological more then anything but I am now trying to make the food we eat together more filling without really packing on the points. Like today's fun fact that he didn't know, is that all fruit except avocados are 0 points. So he ate a banana while making himself a sauteed mushroom and spinach salad. Apparently reading the introduction booklet falls into the manly attribute of not ready manuals.
So for dinner tonight I am making black bean and corn soup with some pita chips on the side.
Black Bean and Corn Stoup
1 cup diced Onion
1 cup diced Carrot
1 cups diced Celery
1 1/4 cup Black Beans, drained and rinced
1/2 cup Canned Corn
1 cup Jarred Salsa
1/2 cup Diced Red pepper
2 cups chicken broth (I used concentrated stock which added 1 pt)
1 cup Roasted Butternut Squash
Pinches of Cumin, Coriander, Chili Powder, and Cayenne (to taste, my husband likes it spicy so I make it a bit spicier and then top with Chipotle Tabasco)
spray oil
1 spray heavy pan with spray oil and heat over medium. Saute onions until translucent an then add the carrots and celery. If the pan is getting too dry add some stock or water.
2 Once the veg is starting to soften, add stock, beans, corn. Simmer for 10 minutes.
3 Add the red pepper and salsa and simmer an additional 10 minutes.
4 Add the butternut squash and allow it to warm up then serve.

Stats:
1/2 of all the soup = 7pts
3 tbsp light sour cream, regular, as topping = 1
cilantro = 0
red pepper = 0
1/2 of whole grain pita = 2
Chipotle Tabasco = 0
Meal total = 10 pts.
1 cup diced Onion
1 cup diced Carrot
1 cups diced Celery
1 1/4 cup Black Beans, drained and rinced
1/2 cup Canned Corn
1 cup Jarred Salsa
1/2 cup Diced Red pepper
2 cups chicken broth (I used concentrated stock which added 1 pt)
1 cup Roasted Butternut Squash
Pinches of Cumin, Coriander, Chili Powder, and Cayenne (to taste, my husband likes it spicy so I make it a bit spicier and then top with Chipotle Tabasco)
spray oil
1 spray heavy pan with spray oil and heat over medium. Saute onions until translucent an then add the carrots and celery. If the pan is getting too dry add some stock or water.
2 Once the veg is starting to soften, add stock, beans, corn. Simmer for 10 minutes.
3 Add the red pepper and salsa and simmer an additional 10 minutes.
4 Add the butternut squash and allow it to warm up then serve.

Here is the soup simmering away.
Stats:
1/2 of all the soup = 7pts
3 tbsp light sour cream, regular, as topping = 1
cilantro = 0
red pepper = 0
1/2 of whole grain pita = 2
Chipotle Tabasco = 0
Meal total = 10 pts.
Yogurt Making Tutorial
How to Make Yogurt
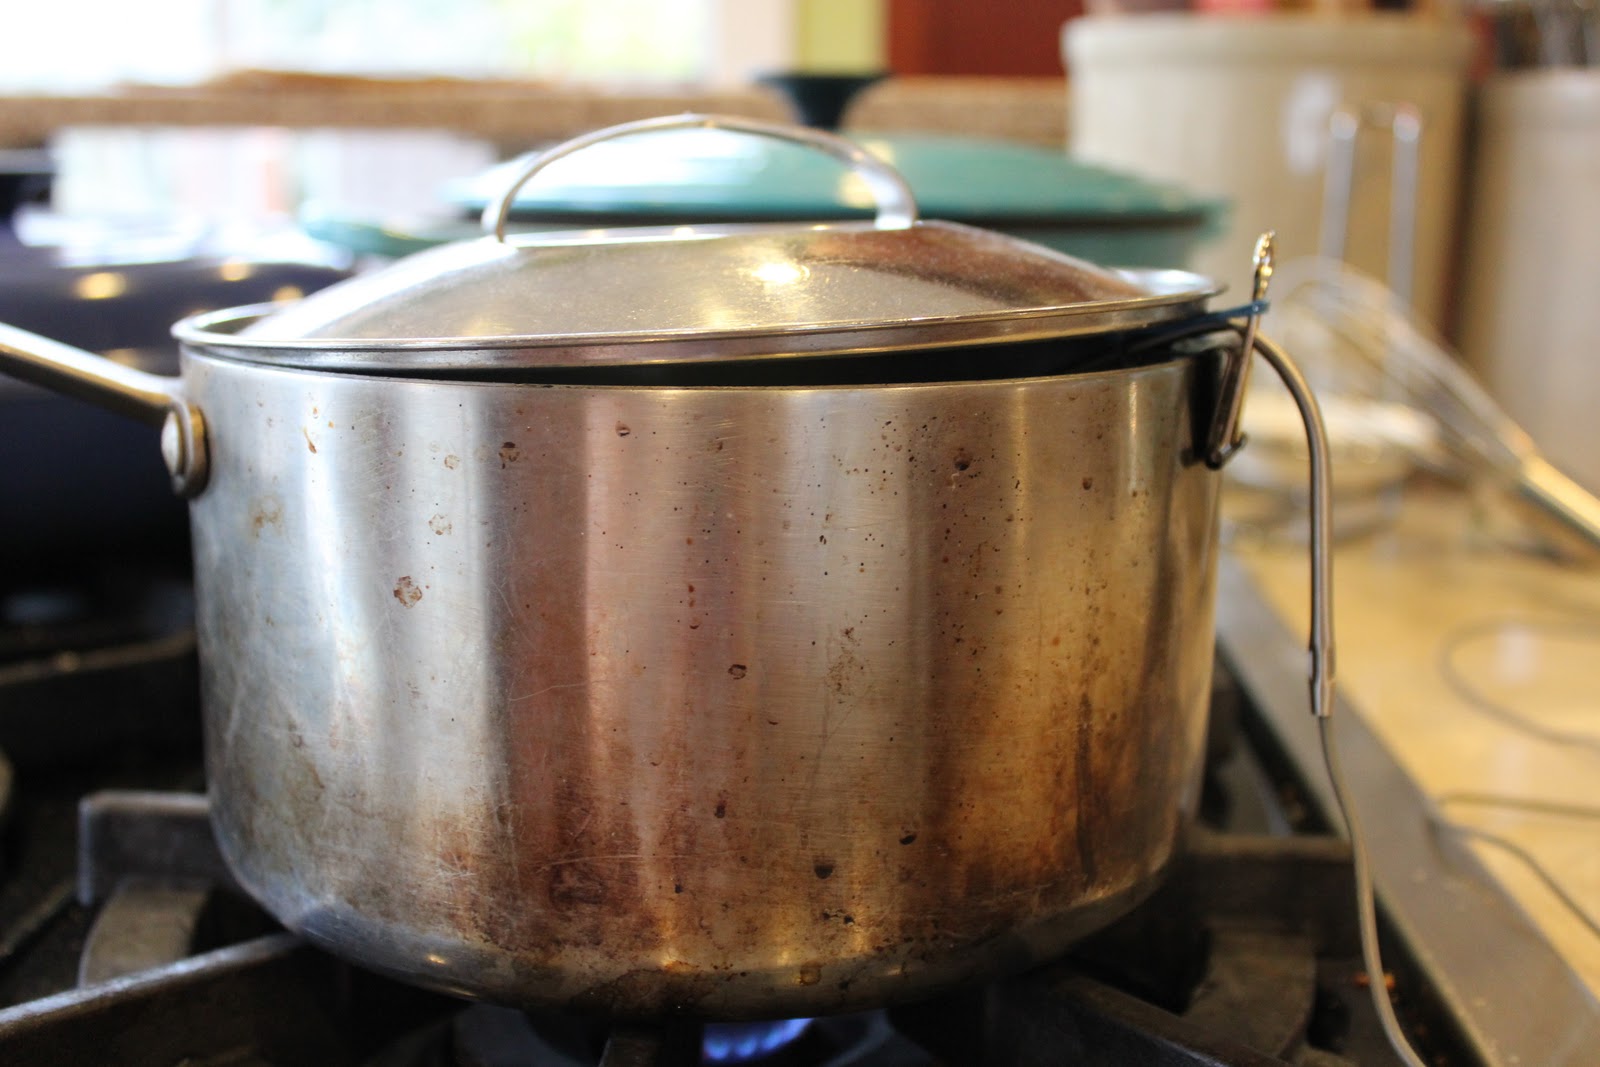
1 Start with a pan, I like a pan that is easy to clean and somewhat wide on the bottom.

2 You'll need some milk, I am using whole milk this time but feel free to use what ever milk you want. I normally use 2% but I thought I would try Homo milk to see the difference. Apparently reduced fat milks produce rather firm yogurt since the manufacturers add milk proteins to cover up for the lack of fat. I haven't made yogurt with skim milk but it might be something I try in the future.

3 Pour the milk into the pot. I know this is basic stuff, but sometimes it is necessary to spell everything out step by step


4 Time to take it's temperature. I insert a probe thermometer in to the milk, but not touching the bottom of the pan. I use a binder clip (I had to look up the name of it) with an elastic to hold the probe off the bottom of the pan. I channeled some MacGyver here, I am pretty impressed by myself.


6 While the milk is heating, take some yogurt from an earlier batch or from a commercially produced yogurt (make sure it says active cultures on the container) and let it come to room temperature. You will need 2-4 tbsp per 1 liter of milk. What you're doing is adding the culture into the milk which slowly spreads it way through the milk giving it the texture and taste of yogurt.

6a While the milk is heating turn on the oven light. I find that this produces enough warms to keep the milk mixture warm so that the bacteria keeps growing.
7 Once the milk has made it to the desired temp, this took 35 minutes for me today, I usually take it to 190F Today I will try to keep it at 180F - 190F for 15 minutes to see how it changes the final product (I do this by . To take it off the heat and let the milk cool to 110F. *If you do keep it at temp for a bit you will probably have to skim the skin off the top*. The cooling process took about 20 minutes.


10 I like to wrap the filled jars to keep it warm.
11 Place the jar into the oven with the door closed and the oven light on and let it sit there for 6-12 hours. The long that you leave it the thicker and tangier it will become. I keep experimenting with the time that works in my batches and I think the longer the better. Remember that since this yogurt doesn't contain any preservatives it will continue to "mature" in the fridge, although not a great deal.

12 After the yogurt has been kept warm for the desired time, then it is time to chill and then enjoy.
Black Beans and Chocolate
I have selected another Pinterest posting of a recipe. That being said I may have been the one that posted it or I may have found it there, I can't remember since I read that blog anyways - ohhh well.
This morning for Sunday breakfast I decided to make Vegan Black Bean Brownie Pancakes. This recipe is from My Little Celebration.
This is my first time using a flax egg as well, interesting process. This recipe isn't really clear on how to use the flax egg since it calls for:
1 flax egg [1 Tbsp. flaxseed meal + 2/5 Tbsp. water] I think it means 2 - 5 tbsp of water rather then 2/5th of a tbsp of water, which my original interpretation of it. But the interwebs saved me on this one.
I also put in too much salt which may have made it a little bitter, but I don't know. The kids weren't too fond of them but then again my kids generally eat regular whole wheat pancakes with egg and milk in it and pancake syrup on the top. So although they are generally good eaters, I am pleased to say that they tried them but unfortunately they weren't impressed by them. I might make them again for guest who might be of the vegan persuasion but we will see. I will give them one more go in the future to see if they get any better.


This morning for Sunday breakfast I decided to make Vegan Black Bean Brownie Pancakes. This recipe is from My Little Celebration.
This is my first time using a flax egg as well, interesting process. This recipe isn't really clear on how to use the flax egg since it calls for:
1 flax egg [1 Tbsp. flaxseed meal + 2/5 Tbsp. water] I think it means 2 - 5 tbsp of water rather then 2/5th of a tbsp of water, which my original interpretation of it. But the interwebs saved me on this one.
I also put in too much salt which may have made it a little bitter, but I don't know. The kids weren't too fond of them but then again my kids generally eat regular whole wheat pancakes with egg and milk in it and pancake syrup on the top. So although they are generally good eaters, I am pleased to say that they tried them but unfortunately they weren't impressed by them. I might make them again for guest who might be of the vegan persuasion but we will see. I will give them one more go in the future to see if they get any better.

Someone was helping in the kitchen. They were both beside me in the kitchen earlier making it hard to work since they wanted to touch everything. Sometimes that is easier then others. The real problem is that they fight to get closer so that ends up in a screaming match with some pushing and if I'm lucky some pinching or biting :)

This is a food processor recipe which makes it loud for little ears which is why they left.

I transferred it into another bowl for easy scooping.

After some trial and error, I found that the non-stick pan had to be only slightly greased and the pancakes had to go from glossy and wet to

dried and matte. The first few followed the directions and were difficult to turn over and still rather raw even when crispy on both sides and these aren't thick pancakes at all.

Little Misses favorite part was the whipped cream that I added to it. Not Vegan but then again neither are we :)

Here is the finished pile of pancakes. They do look like brownies, I will have to try them again with less salt. Interesting concept and I will probably try the actual Vegan Black Bean Brownies as well
Saturday, 21 January 2012
Pinterest has Sucked out My Brains.
Pinterest is strangely addicting and I don't know why. I guess it is all those pictures of neat thing that other people have found and want to try. Today I will be making one of those Pins I found there.
Tonight's Dinner will be salmon, quinoa salad with roasted butternut squash and Roasted Broccoli. The recipe for Roasted Broccoli will be changed up a bit since I don't a) have enough broccoli and b)I have a huge bed of cauliflower that is taking up room in my fridge that could be used for other projects that I want to make. So it will be a blend of cauliflower and broccoli for tonight's side dish.


The recipe turned out really well, I do like the lemon and the roasted garlic. Tasty, and I will definitely make it again.
Tonight's Dinner will be salmon, quinoa salad with roasted butternut squash and Roasted Broccoli. The recipe for Roasted Broccoli will be changed up a bit since I don't a) have enough broccoli and b)I have a huge bed of cauliflower that is taking up room in my fridge that could be used for other projects that I want to make. So it will be a blend of cauliflower and broccoli for tonight's side dish.

Here I am tossing the veggies with olive oil, salt, pepper and sliced garlic (you can't see the garlic in this picture since I hadn't added it yet, but it will be there)
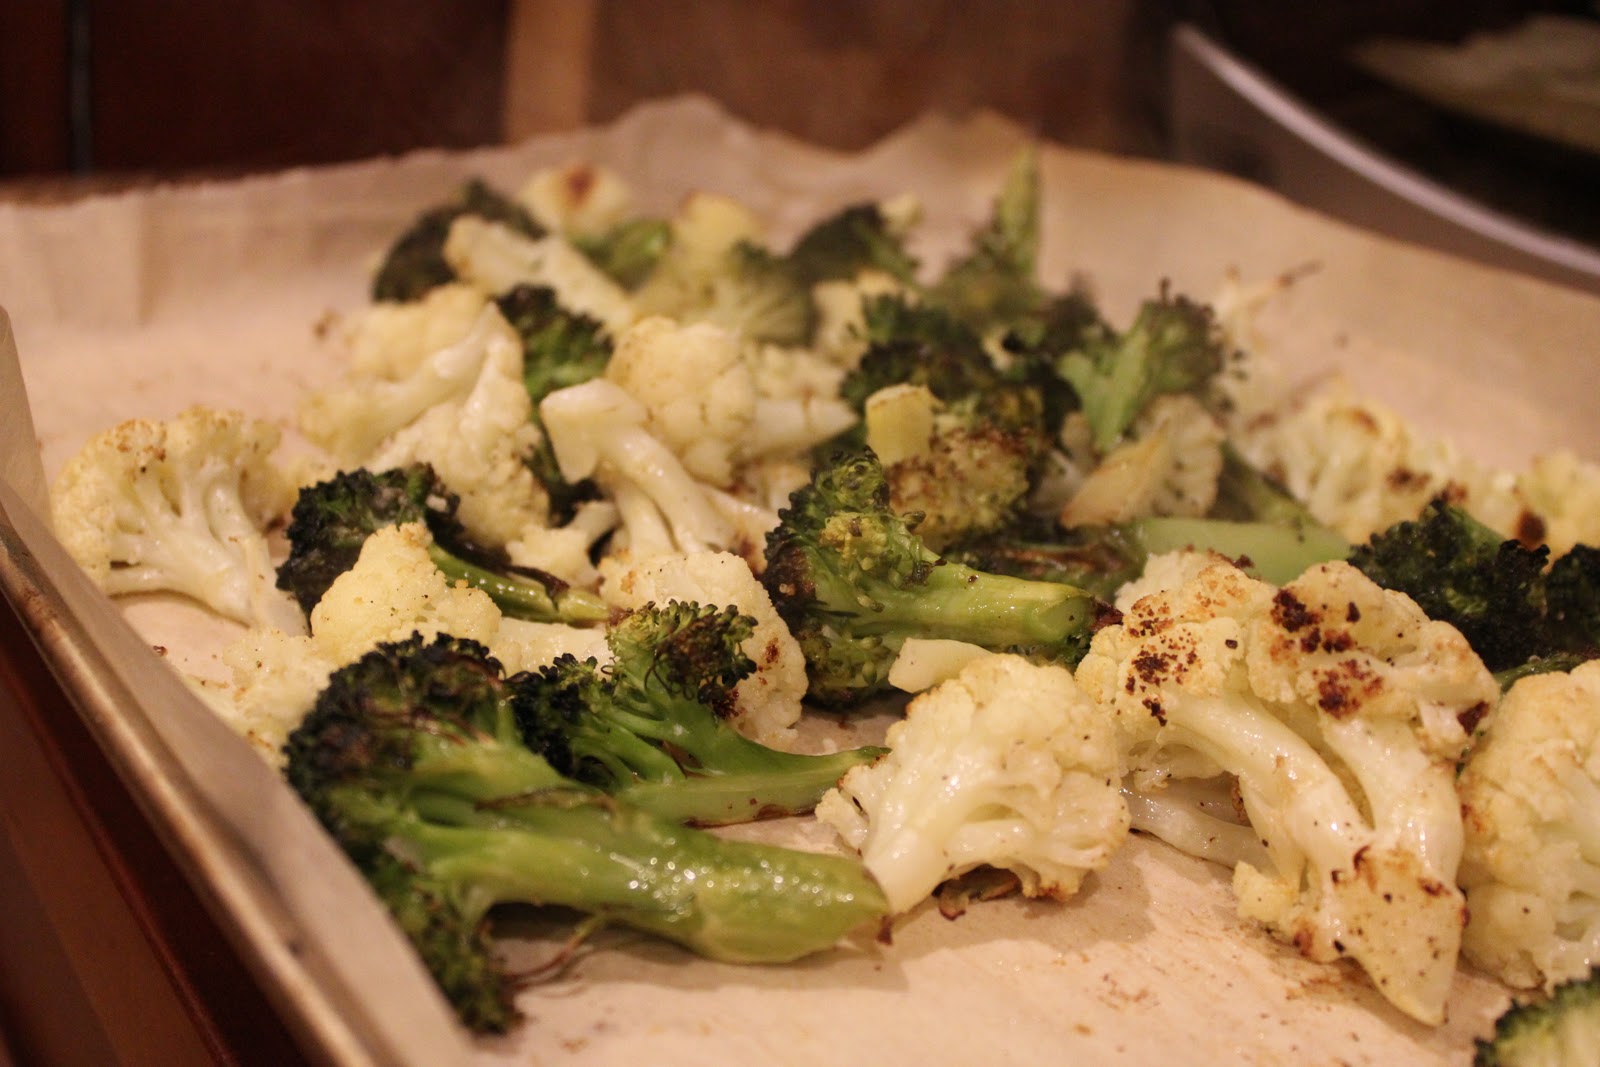
Here are the lovely roasted veggies, I just top with lemon zest, lemon juice and a bit more olive oil.
The recipe turned out really well, I do like the lemon and the roasted garlic. Tasty, and I will definitely make it again.
Wednesday, 4 January 2012
Smoothie Breakfast

I am trying to follow some of the advice of Peas and Thank you using her Pealightful-Plan. This is based on the smoothie from the breakfast plan. Now, you have to excuse the colour since it looks a little green but that might be the spinach. There are a few new additions to my normal smoothie mix. I usually use fresh banana, frozen fruit and milk, but this time I added just frozen bananas, unsweetened almond milk, fresh spinach, raw oatmeal, natural peanut butter, and cocoa powder. It was delicious, although I decided to add another 1/4 c of oatmeal next time I will try to add it all at the beginning to make sure that it is ground finer then it was. I was amazed by the smoothie, it was delicious. I was doing a banana, chocolate, peanut butter flavour and it as thick and delicious.
Good Morning Smoothie
based on Peas and Thank You
1 cup Unsweetened Almond Milk
1-2 cup Frozen Banana
2 tbsp Cocoa Powder
1-2 tbsp Natural Peanut Butter
1-2 handfuls Spinach
1/4-1/2 cup Old Fashioned Oats
1 Place all the ingredients in the blender and wizz it up until it is all blended together and smooth.
2 Place in a glass and Enjoy!
Yogurt Time
I came across a post about whether you should bother buying a yogurt making or if it is just something to take up counter space. And this lead me to 3 articles about making yogurt at home without buying a unitasker. My favourite article was by Harold McGee, know for his food science book "On Food and Cooking: The Science and Lore of the Kitchen" which is a great book if you want to know why cooking works the way it does and why ingredients change they way they do when cooking.
The yogurt making process is rather simple and I can see why you don't need a yogurt maker to make it.
Making Yogurt
You can use almost any type of milk to make yogurt, although skim milk makes a thin and a little grainy yogurt. I would suggest using whole or 2% milk to start and if you want try 1% or skim milk. You can always add a package of gelatin to the warmed milk to make a firmer yogurt.
1 For every liter of milk your cooking you'll need 2 tbsp of yogurt, either from a previous batch or from commercially produced yogurt (preferably, live culture and plain. You could probably use flavoured as well, I haven't so I don't really know). 1a) Start by taking out your yogurt (I used approximately 2 tbsp for every liter of milk) and let it come to room temp on the counter while you do all the other stuff. Cold buggies don't do a lot, but warm ones are great for making yogurt. 1b) Also, turn on your oven light to warm up the oven just a bit.
2 heating milk in a sauce pan on low to 180-190 degrees F. There is where a digital thermometer is very helpful (and even butter when you turn the alarm on, but I'll get back to that later.
3 Once the milk has been heat to 180 or so, then let the milk cool to 110F.
4 Then add your room temp yogurt and mix with a whisk to get everything mixed well and then pour into a warmed glass jar, cover and wrap with a towel.
5 Place in the oven, wrapped in the towel, and let sit for 6-10 hours. The amount of time that is required to culture the yogurt depends on how you like your yogurt. I let mine sit for 6 hours this time which leaves the yogurt mellower and thinner. Essentially the shorter the time the yogurt is left to mature the mellower and thinner the resulting product. The longer the time you leave it the tangier and thicker the product. It will also get tangier in the refrigerator since there aren't any of the commercial preservatives or stabilizers.

The yogurt making process is rather simple and I can see why you don't need a yogurt maker to make it.
Making Yogurt
You can use almost any type of milk to make yogurt, although skim milk makes a thin and a little grainy yogurt. I would suggest using whole or 2% milk to start and if you want try 1% or skim milk. You can always add a package of gelatin to the warmed milk to make a firmer yogurt.
1 For every liter of milk your cooking you'll need 2 tbsp of yogurt, either from a previous batch or from commercially produced yogurt (preferably, live culture and plain. You could probably use flavoured as well, I haven't so I don't really know). 1a) Start by taking out your yogurt (I used approximately 2 tbsp for every liter of milk) and let it come to room temp on the counter while you do all the other stuff. Cold buggies don't do a lot, but warm ones are great for making yogurt. 1b) Also, turn on your oven light to warm up the oven just a bit.
2 heating milk in a sauce pan on low to 180-190 degrees F. There is where a digital thermometer is very helpful (and even butter when you turn the alarm on, but I'll get back to that later.
3 Once the milk has been heat to 180 or so, then let the milk cool to 110F.
4 Then add your room temp yogurt and mix with a whisk to get everything mixed well and then pour into a warmed glass jar, cover and wrap with a towel.
5 Place in the oven, wrapped in the towel, and let sit for 6-10 hours. The amount of time that is required to culture the yogurt depends on how you like your yogurt. I let mine sit for 6 hours this time which leaves the yogurt mellower and thinner. Essentially the shorter the time the yogurt is left to mature the mellower and thinner the resulting product. The longer the time you leave it the tangier and thicker the product. It will also get tangier in the refrigerator since there aren't any of the commercial preservatives or stabilizers.

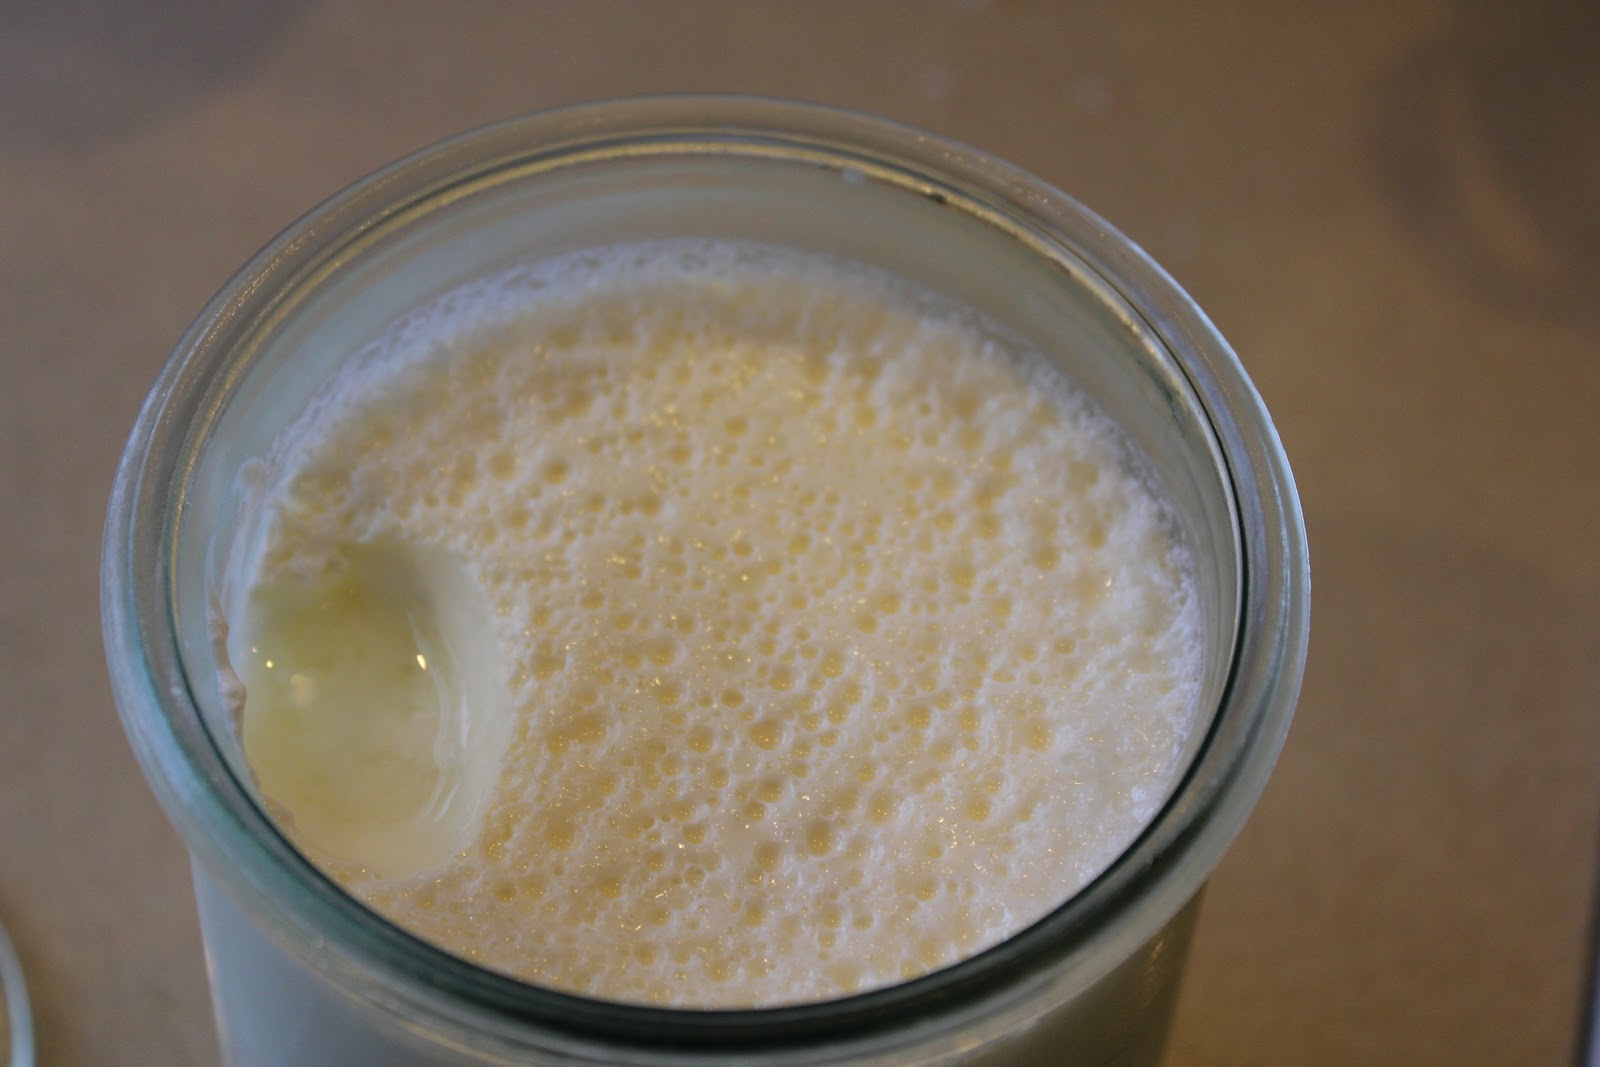
Here is my new additions. Yogurt and a new Weck Tulip 1L jar. I have been ogling Weck jars for years but they aren't available locally but I did find a place in Vancouver that were selling them, so I picked up 2 - 1L jars.

I had a taste of it to make sure that it was good, and it was. That liquid is the whey that always comes out when you disturb the protein strands.
Final Notes:
~I got a migraine in the middle of the process of heating the yogurt and I hadn't turned on the temp alarm on my digital thermometer, so I didn't catch it until it made it to 215F, I let it cool to 110F and followed the rest of the directions. Still tasty and yogurty :)
~If you like greek yogurt, then once the yogurt has set, spoon the yogurt into a fine mesh strainer or a strainer lined with cheese cloth over a bowl and let all that drain in the fridge overnight or until it is as thick as you like. The whey is yellow-green liquid in the bowl which is full of riboflavin and is apparently a nice drink with a bit of sugar or salt.
~If you want fruit flavoured or honey yogurt, you can blend up some fruit and mix it in the yogurt once it has cultured in the oven. I haven't tried this but I think I might try some honey yogurt since this is the kids favorite. I might also try adding the honey to the warm milk rather then to the cultured yogurt, but I don't know if that will work as well as I want it too, I guess I will have to try :)
~If your interested in using a slow-cooker then try this article. I haven't tried it but it looks interesting.
Sunday, 1 January 2012
Turkey Cranberry New Years' Risotto
We are up a Whistler again this year for New Years. It has been a rather low key affair since some of our regular attendees were unable to come up with us this year so it has been much quieter and I have only visited the hot tub once the whole trip, it has been a bit weird.
I was sort of in charge of dinner last night. We had left over turkey in the freezer and we had already made stock from the bones, so I decided to do a risotto. I had picked up some arborio rice but I magically forgot the other key ingredient : Parmesan. I usually use a risotto and rice cookbook for the base recipe but this time I picked a Jamie Oliver recipe but since I didn't have a scale I had to guess at the amount of rice and wine :) The plan was to make a turkey cranberry risotto and it turned out beautifully especially topped with left over cranberry sauce.

Turkey and Cranberry Risotto
1 large Onion, finely diced
4 cloves Garlic, finely diced
2 tbsp Butter
1 tbsp Olive Oil
1 stalk Celery, finely diced
1 Carrot, finely diced
2 cups Arborio Rice
2 wine glasses of White Wine (approximately 8oz or 1 cup of wine)
approximately 8 cups of Turkey Stock
1/3 cup Dried Cranberries
3-4 cups left over Turkey, diced
2 tbsp butter
Salt
Pepper
Cranberry Sauce (to serve with the risotto)
1/2 -1 cup parmesan (optional, we didn't have any and it as still really delicious)
1Prepare all veggies and bring stock up to a simmer before starting the cooking process. Add the dried cranberries to the stock to rehydrate (Add them into the risotto with the stock)
2In a large skillet heat heat 2 tbsp butter and Oil. Saute onion, garlic, carrots and celery until translucent. Add rice and saute until translucent (Approx. 3-5 minutes).
3 Deglaze pan with the wine and stir until the wine is almost soaked into the rice (1-2 minutes) then add approximately 1 cup of stock and let that absorb into the rice. Once that is almost gone add more stock a ladle full at a time and waiting for the stock to be mostly absorbed before adding more. Stirring frequently.
4 Once the rice has started to plump up, keep testing the rice to see if it getting tender. You know your almost done when the rice is cooked. Add the turkey and stir to heat through and then remove from heat and add 2 tbsp of butter and stir through, cover and let sit for a few minutes. If using parmesan, then add with the butter, cover and let sit for a few minutes.
5 Enjoy!
I was sort of in charge of dinner last night. We had left over turkey in the freezer and we had already made stock from the bones, so I decided to do a risotto. I had picked up some arborio rice but I magically forgot the other key ingredient : Parmesan. I usually use a risotto and rice cookbook for the base recipe but this time I picked a Jamie Oliver recipe but since I didn't have a scale I had to guess at the amount of rice and wine :) The plan was to make a turkey cranberry risotto and it turned out beautifully especially topped with left over cranberry sauce.

Turkey and Cranberry Risotto
1 large Onion, finely diced
4 cloves Garlic, finely diced
2 tbsp Butter
1 tbsp Olive Oil
1 stalk Celery, finely diced
1 Carrot, finely diced
2 cups Arborio Rice
2 wine glasses of White Wine (approximately 8oz or 1 cup of wine)
approximately 8 cups of Turkey Stock
1/3 cup Dried Cranberries
3-4 cups left over Turkey, diced
2 tbsp butter
Salt
Pepper
Cranberry Sauce (to serve with the risotto)
1/2 -1 cup parmesan (optional, we didn't have any and it as still really delicious)
1Prepare all veggies and bring stock up to a simmer before starting the cooking process. Add the dried cranberries to the stock to rehydrate (Add them into the risotto with the stock)
2In a large skillet heat heat 2 tbsp butter and Oil. Saute onion, garlic, carrots and celery until translucent. Add rice and saute until translucent (Approx. 3-5 minutes).
3 Deglaze pan with the wine and stir until the wine is almost soaked into the rice (1-2 minutes) then add approximately 1 cup of stock and let that absorb into the rice. Once that is almost gone add more stock a ladle full at a time and waiting for the stock to be mostly absorbed before adding more. Stirring frequently.
4 Once the rice has started to plump up, keep testing the rice to see if it getting tender. You know your almost done when the rice is cooked. Add the turkey and stir to heat through and then remove from heat and add 2 tbsp of butter and stir through, cover and let sit for a few minutes. If using parmesan, then add with the butter, cover and let sit for a few minutes.
5 Enjoy!
Friday, 30 December 2011
Another Butternut Squash Lasagna
I decide to tackle that Roasted Butternut Squash and Yam Lasagna and my version of it which I had added spinach and ricotta. I found the original tasty but really oily so I decided to take another attempt at it again but change it up to try to make it a bit healthier and much less greasy.

Here is the last piece of the lasagna, I didn't get any pictures of the process or any other part of the lasagna.

This recipe is sweet and rich tasting but not greasy.

Lovely sage on the top. I decided to add some sage to the filling as well since it needed to add more then decoration.
Roast Butternut Squash and Yam Lasagna
Adapted from: How Sweet It Is
6-9 oven ready Lasagna Noodles or Fresh Lasagna Noodles
Medium Butternut Squash
2 Medium Yam
1/4 tsp Nutmeg
Olive Oil
3 tbsp Butter
4-5 small Shallots, finely chopped
3-4 Garlic Cloves, finely chopped
6 Sage Leaves, finely diced9-12 Sage Leaves, left whole
6 oz Mascarpone Cheese
6 oz Light Cream Cheese
1 cup Parmesan, grated
1 1/2 cup shredded Mozzarella
Salt and Pepper to taste
1 Preheat oven to 350.
2 Peel and cube the butternut squash and the yam. Line the baking sheet with parchment and lay the cubed squash on the baking sheet. Drizzle with a bit of olive oil and season with nutmeg, salt and pepper, then roast for 30-45 minutes or until the squash has is soft and starting to caramelize then remove from the oven and let cool. Once cool, mash up the squash up (I like it a bit chunky)
3 In a small frying pan heated to medium, heat the butter and saute the shallots, garlic and sage until they are tender and translucent and then remove from the heat and let cool 5-10 minutes.
4 In a bowl add shallot, mascarpone, cream cheese, parmesan, salt and pepper (to taste).
5 Now it is time to put everything together. In a buttered 8"x8" glass baking dish, lay a layer of noodles and top with half of the squash mash and then smooth out the top. Top that with half of the cheese mixture and then slightly less then half the mozzarella. Then another layer of noodles, then the last of the squash and the last of the cheese mixture. Top that with the remaining mozzarella and the sage leaves.
6 Bake at 350 for 45 minutes or until bubbly and golden.
7 Enjoy!
Subscribe to:
Posts (Atom)