Monday 15 December 2014

Microwave Meringue

I was surfing the net, as one does, and I came across a video from a British Blog (which I will post when I find it again.) They made Meringues in the microwave.  Luckily I had 2 egg whites in the fridge from a recent cookie dough making spree, I knew that there would be some meringues made with the kids.


Rosie did not want to participate, or course she still wanted to eat the final results. Ladybird and I went about experimenting with it.  We started out with 300g of icing sugar in a bowl and 1 egg white.  Ladybird wanted to add a bit of vanilla to hers which left it a bit goopy, so we had to add in some extra and that worked a treat.  Mixed until it is stiff none sticky dough.  Roll it into a ball about an 1 inch in diameter and then microwave.  

Microwaving will probably take a bit of experimenting, my microwave is 1480W, I dropped it to 70% power for 1 minute.  The first ones we put in the microwave at full power for 90 seconds and ended up with these on the right.  Rosie loved it and asked for more burnt ones.  If burnt is what you are looking for, then cook on high for 90 seconds or until you smell caramelizing sugar, 


Microwave Meringue
Makes about 18 good sized meringues

400g Icing Sugar
1 Egg White
1/2 tsp Vanilla or other flavouring such as peppermint

~In a medium sized bowl, put icing sugar, egg white and flavouring.  

~Mix with a fork until it becomes difficult and then start to mix by hand.  If it is still sticky then add more Icing sugar.

~Roll in to a ball about 1 inch in diameter, place on a paper towel on a plate.

~Lower the power level to 70% and cook for 1 minute.  Remove from the microwave and let cool slightly before removing from the paper towel.


 Simple and delicious, I think I will make Pavlova for dessert tonight.  Enjoy!
K.


Sunday 14 December 2014

Christmas Cookies 2014 - Browned Butter Chocolate Chip Cookies

There is something extra nice about browned butter, the added nutty quality makes it takes richer then just plain Jane butter.

This is another cookie that was included in last year cookie gift giving. I am almost sorry to say that I ate a lot of these straight from the freezer.  I know I had to make extra batches last year since I kept eating the ones that I had planned to give away.  Be aware these are super delicious.


Browned Butter Chocolate Chip Cookies
original recipe adapted from Baking the Goods
Makes 4 dozen cookies using a #24 cookie disher (1.33 oz each)

2 cups + 2 tbsp Butter
2 cups Brown Sugar
1 cup Sugar
4 tsp Vanilla
2 Eggs
2 Egg yolks
4 1/2 cups all purpose Flour
2 tsp Salt
2 tsp Baking Soda
3 cups Semi Sweet Chocolate Chips.
Sea Salt (Optional to sprinkle on the cookies before baking)

~Place 2 cups of butter in a medium metal or light coloured pan at medium heat. Stirring frequently the butter will come the boil and foam up, once the butter reaches an amber colour, remove from the heat and place in a 2 cup liquid measuring cup.  Cool the butter until it starts to thicken, either in the fridge or in an ice bath.  Once the butter is cool but not hard, you can add the addition butter to bring it up to 2 cups.

~Cream the browned butter and sugars until fluffy.  The mixture will be quite soft because of the butter.  Add Vanilla and Eggs, one at a time.  

~In a separate bowl combine all the dry ingredients except the chocolate chips.

~Gradually add the dry ingredients in to the butter mixture until just combined and then add the chocolate chips.  Stirring to evenly distribute.

~I use a portion disher sized #24 which gave me 49 cookies.  4 dozen +1 cookie (although that would probably give me more if I hadn't done a proper quality check ;)


~Portion out cookies, freeze and then package up in a zip top bag.  OR Chill 30+ minutes and then bake in a 350F preheated oven for 10-12 minutes, let cool 5 minutes on tray before transferring to a rack to cool.

Enjoy!
K.

Christmas Cookie 2014 -- Earl Grey Tea Cookies


I am running behind with my Christmas baking this year and I won't be making any chocolate truffles which is a bit sad.  I am still making more variety of cookies.  This is a repeat from last year because it was quite delicious or some I am told :)


This cookie is rolled into a log, wrapped and frozen.  The frozen log can be unwrapped, sliced and baked.  I can't get easier then that.  

I made a double batch which made 4 logs, 308g each. Then wrapped in parchment and twine, much prettier then the plastic zip top bags.

This recipe comes from Martha Stewart's Cookies,  Thank you Martha.  My 8 year old loves to make cookies from this book.  This is a simple recipe with only 6 ingredients.

Earl Grey Tea Cookies
Original recipe Martha Stewart
Makes 2, 308g (approx) logs
2 cups All-Purpose Flour
2 tbsp fine ground Earl Grey Tea (I used Tazo earl grey and it took 6-7 tea bags)
1/2 tsp coarse Salt
1 cup (8oz) unsalted butter (if using salted butter, decrease added salt)
1/2 cup Icing Sugar
1 tbsp finely grated orange zest.

~In a bowl combine flour, tea and salt.

~Cream room temp butter, icing sugar and zest for about 3 minutes or until the mixture is pale and fluffy (easiest to use a mixer)

~Slowly add in flour mixture.  Mix until just combined.

~Divide dough in half.  Form into a log and roll up in parchment, turn the ends of the parchment and tie off with ribbon or twine.  Place in freezer until ready to give as a gift.  Alternatively you can freeze for 1 hour then slice about 1/4 inch thick and bake in a preheated 350F oven until the edges golden.  Let cookies cool on the cookie sheets.  Store at room temperature for up to 5 days.

Christmas Cookies 2014 -- Peanut Butter Chocolate Chip Chocolate Chocolate Chip

I generally only get someone a present if I find something perfect for them, which is usually by accident.  I usually just give them that present if I do find it, I am really bad at keeping something like that under my hat for however long it takes for a present giving opportunity. There is one except to this -- consumables.

I have a theory that people love to eat more sweets this time a year and there are many occasions for people to share them with others.  There are also many occasions that recipients might be overwhelmed with the quantity of sweet they receive that might go stale before they get to savour them.  The solution to this is to make cookie dough and freeze it so that the cookies can be cooked up fresh when needed/wanted or just eaten frozen from the freezer.

The first cookies that I made this year are a Yin/Yang cookie.  Half the cookie is a Peanut Butter Chocolate Chip cookie dough and the other half is a Chocolate Chocolate Chip cookie dough.

I found the recipe for this cookie at Sally's Baking Addiction, I did change how I put them together since I was trying to stream line the production to aid in freezing these puppies up.  

Yin Yang Peanut Butter Chocolate Chip Chocolate Chocolate Chip
Original recipe created by  Sally's Baking Addiction

Chocolate/ChocolatePeanut Butter
IngredientsSingle BatchDouble BatchSingle BatchDouble Batch
Butter1/2 c1 c1/2 c1 c
Sugar1/2 c1 c1/2 c1 c
Brown Sugar1/2 c1 c1/2 c1 c
Egg1212
Peanut Butter-- 3/4 c1 1/2 c
Vanilla1 tsp 2 tsp 1 tsp 2 tsp
Flour1 c (125g)2 c (250g)1 1/4 c (156g)2 1/2 c (312g)
Cocoa1/2 c + 2 tbsp1 1/4 c- -
Baking Soda1 tsp2 tsp1/2 tsp1 tsp
Salt1/2 tsp1 tsp1/4 tsp1/2 tsp
Milk2 tbsp1/4 c--
Chocolate Chips1 c2 c1 c1 c

I made this chart to help me keep track of the ingredients when I doubled the batch.  Pick the set of columns either single batch or double batch, then make both types of cookie dough.  

Both cookies go together in the same way.

~Cream Butter and then add sugar.  Beat until fluffy.  Add Eggs one at a time and Vanilla.  Add the peanut butter for the peanut butter cookies.

~In another bowl combine all the dry ingredients, except the chocolate chips which you will mix in after mixing the dry ingredients in to the wet.  

~Combine dry ingredients slowly into the wet until just combined.  Then add chocolate chips.

~Form each dough into a log shape, wrap in plastic and refrigerate at least 1 hour but 2 would be better.  If making a double batch shape into 2 logs for ease of handling.   

~Once chilled, remove both doughs from the fridge.  Using a knife or a bench scraper, cut the chocolate/chocolate log lengthwise and then into cut each side of the cut log into 12 pieces.  You want a total of 24 pieces of each single batch of dough, or 48 for a double batch.  Repeat with the Peanut butter dough.  

~Then take a piece of each dough and put them together and roll between your hands to form a dough ball.  The peanut butter dough will be softer, so try to make sure that you have an even amount of each type of dough visible.  That way your friends will be in awe of your wicked skills.

~Now you can either place on a cookie sheet freeze and then bag up these little (enormous) cookies.  These do make a very large cookie :)  -OR- you can bake these bad boys at 350F for 10-12 minutes.  They will look under cooked but leave them on the cookie sheets to cool and they will gain a bit of structural integrity while still being soft.


Not very visually appealing in this form but there is something wonderful about frozen cookie dough right out of the freezer.  

Enjoy!
K.

Saturday 19 July 2014

Curry Pickles

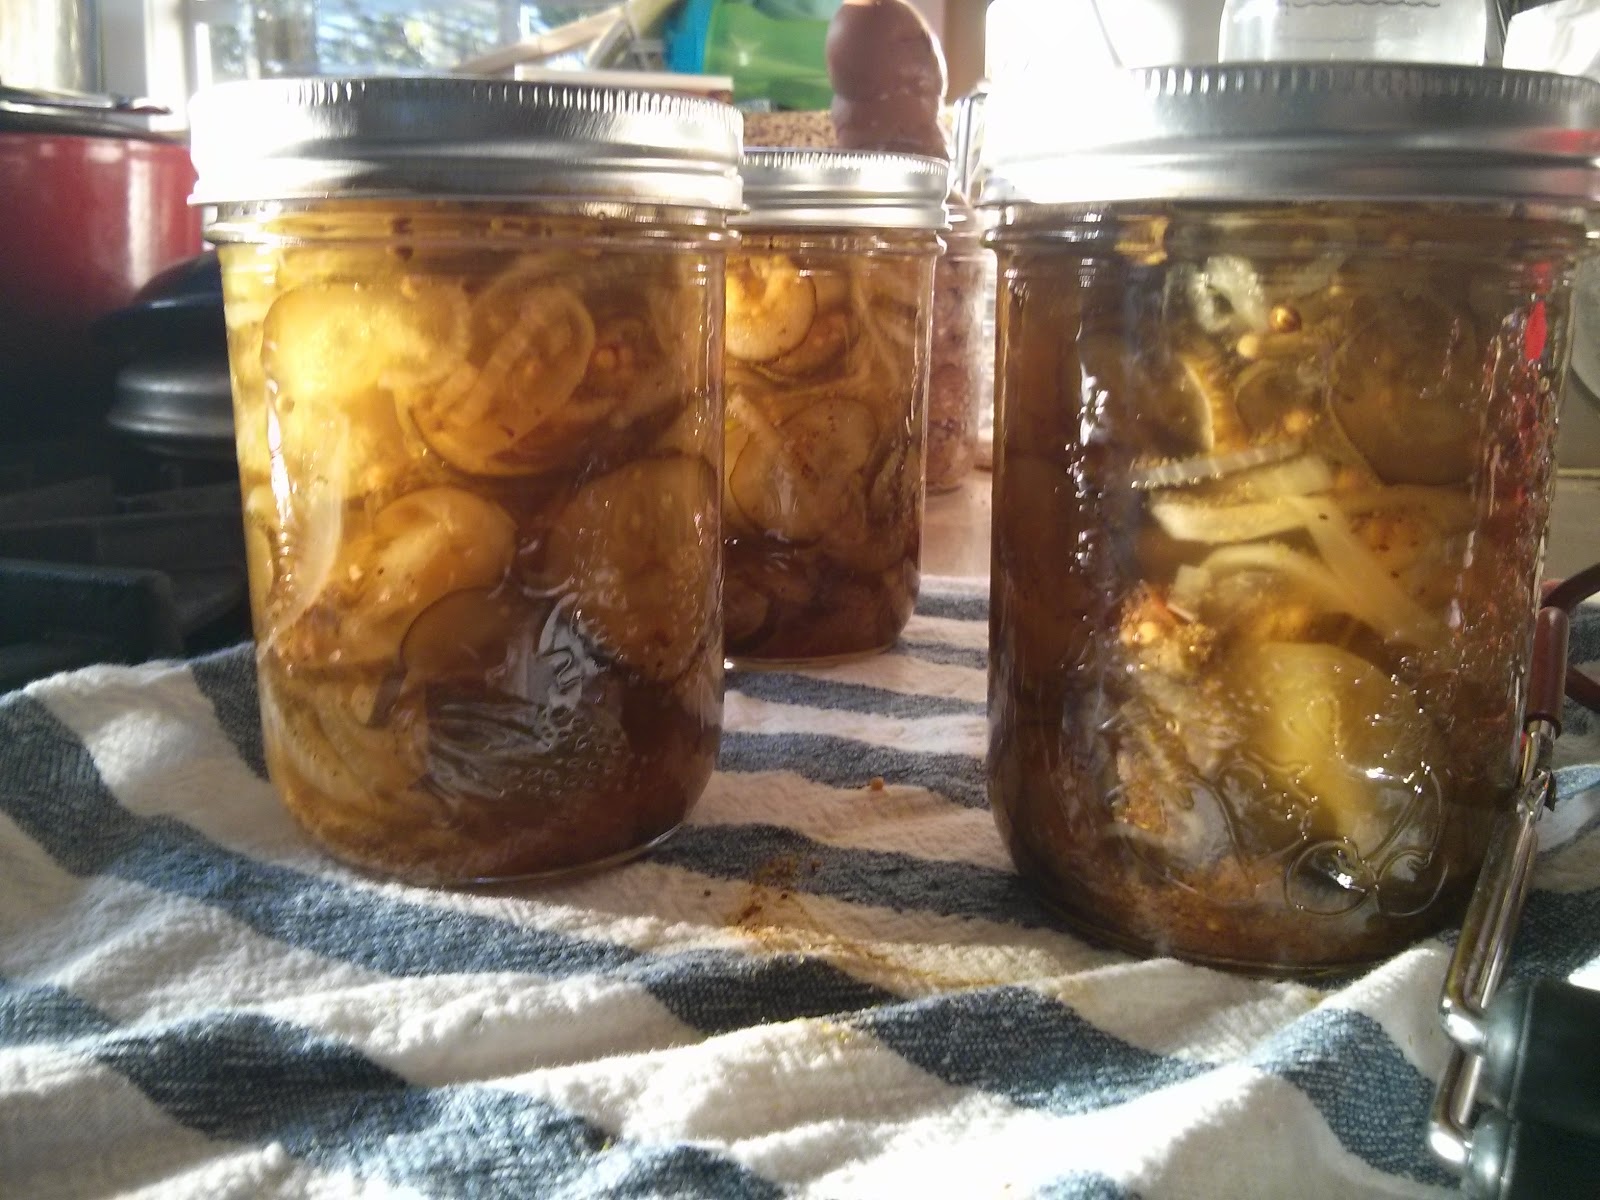
Up at the cottage at the Saturday market thers is a woman we call the preserve lady who has all sorts of wonderful canned goodies, jams, jellies, pickles, and chutneys.  We all really love her curry pickles.  We had an abundance of garden cucumbers which a new thing for me, I decided to try to male our own curry pickles.  The garden cucumbers were not specifically pickling cuccumber but since we don't eat a lot of cucumbers I had to something with the 4 cucumbers that my mother-in-law gave me, plus the 2 I had pulled out of my garden.

Pickles turned out to be pretty easy to make. Salting the onions and sliced cucumbers draws out some of the extra water, just leave it over night and then rinse well to remove the salt and your ready to go.  


These curry pickles are quite sweet but so tasty.  


I cracked open my first jar the next day, so tasty and lovely on hamburgers which I've been wanting all the time this summer.  Or even on the top of hotdogs, sandwiches, or even by themselves.


Curry Pickle

Original recipe from: homemade trade
Recipe makes 4 - 500ml jars

8 cups thickly sliced cucumbers (a bit extra would be good too)
3 small onions
1 tablespoon pickling salt
2¾ cups cider vinegar
1¾ cups sugar
1 tablespoon curry powder
2 teaspoons pickling spice
1 teaspoon celery seeds 
1 teaspoon yellow mustard seeds

Remove the cucumber ends and then cut into thick slices. Thinly slice your onions and place with the cucumber in a large non-reactive bowl. Sprinkle with pickling salt and let stand, covered, for 24 hours.

Prepare 500ml jars, lids and rings. Wash in warm soapy water and then boil 5 minutes in the canning pot.

Drain the cucumbers and rinse them three times with cold water, draining thoroughly.

Combine your remaining ingredients and bring to a boil over high heat in non-reactive pan.

Add the cucumbers and onions and return just to a boil before removing from heat.

Remove hot jars from the canner and fill with vegetables, using a slotted spoon to remove from the pickling liquid. Pack into jars and pour in liquid, leaving 1/2 inch headspace.
Process 10 minutes for pint jars (500ml) and 15 minutes for quart jars (1 liter).

Thursday 17 July 2014

Chocolate Zucchini Bread


Chocolate Zucchini Bread
This is a moist delicious bread. More cake like then bread, but still good. I have made a few alterations from the original recipe that I altered even before I made it. Feel free to alter you specifications and post how they turn out.

This can be made dairy free by removing the chocolate chips or using dairy free chocolate.

3 eggs
1 cup olive oil (I cut that to 1/2 cup)
2 cups sugar (I cut that to 1 1/2 cups)
1 cup apple sauce (I add 3 individual pots of apple sauce, motts. It is not exact amount.)
2 tsp Vanilla
2 cups grated Zucchini
2 1/2 cups flour
1/2 cup cocoa powder
1 1/2 tsp baking soda
2 1/2 tsp baking powder
1 1/2 tsp cinnamon
3/4 tsp nutmeg
1 tsp salt
1 cup chocolate chips (I cut that to 1/2 cup, J does not like too much and I have also tried mini chocolate chips, which are not so obviously chunks of chocolate but still good.)

DIRECTIONS:
Preheat oven to 350 and grease to loaf pans or line with parchment (this make for easy removal.)

Combine eggs, olive oil, sugar, apple sauce and Vanilla. After combined add Zucchini and mix.

In a separate bowl combine all your dry ingredients.

Add dry ingredient to wet in three batches until just blended.

Divide batter between the two pans and place in oven for 1 hour. Test after 45 minutes. If toothpick comes out clean (try to avoid the chocolate chips, they will always look moist :)

Once done remove from oven and place on cooling racks for 10 minutes before removing from pan.

Cool completely and enjoy. This recipe is really easy and tasty

Dutch Dilled Potato Soup

This recipe is from my lovely sister-in-law Marita com Weissenberg
This is probably my favourite soup in the whole world! Mother sometimmes makes it for me. Or I force people to make it for me. I have only been involved in making it once, and never will again (allergy to potatos), so I thought I'd pass the recipe along to the deserving.

Dutch Dilled Potato Soup

6 medium potatos
1 large onion, chopped
2 cloves garlic
2 bay leaves
2 tablespoons butter
1 cup milk
1 1/2 cups grated Gouda cheese
2 tablespoons white flour
2 tablespoons white wine (or sherry, as for the amount: go for it!)
3 tablespoons dill
1 teaspoon paprika
1/2 teaspoon dry mustard
vegetable stock

1) Put potatos, onion, garlic, bay leaves and butter in a large pot and cover with vegetable stock. Simmer until potatos are done.

2) Remove 2/3 of the potatos and mash them, then return them to the pot.

3) Add the milk and the cheese slowly, stirring constantly.

4) Mix the flour in cold water and slowly pour it into the soup, still mixing.

5) Add remaining ingredients.

6) cover and simmer for 10-15 minutes. Then let stand for 30 minutes.

Thursday 10 April 2014

Coconut Rice and Green Sauce

In another cooking experiment I came across a surprising sauce that Ladybug, absolutely adores which is strange since she doesn't really like spicy food.  Rosie isn't fond of it but it is easy enough to serve on the side so I still like to make it.  These 2 recipes are part of the a set of Jamie Oliver 15 minutes meals.  I found the original recipe at Hot Cooking Food Blog,  the whole thing was tasty and delicious, but the rice and the sauce really stand out in my mind.

Coconut Rice
Jamie Oliver, 15 minute Meals

1 can Coconut Milk
300g basmati rice (1 empty coconut milk cans worth)
water
1/2 lemon

This recipe is unique because it uses the can from the coconut milk as the measuring tool.  1 can of coconut milk, 1 can of water and 1 can of rice, Voila!

~To saucepan add coconut milk and 1 can of water.  Rinse 1 can of rice until it runs clear and add to saucepan.  Add lemon.  Bring to the boil, put a lid on the saucepan and turn down the temperature to simmer.  Simmer 10 minutes, test the rice for doneness, remove from the heat.

~Serve.

Chili Miso Green Sauce
Jamie Oliver, 15 minute Meals

1/2 Fresh Red Chili pepper
Thumb sized piece of Ginger, peeled
1 tbsp Miso Paste
1 bunch Cilantro
Juice 1/2 lemon
2-3 tbsp Light Soy Sauce
1 1/2 tsp honey
500g-1kg green veggies such as sugar snap peas, broccoli, asparagus, green beans.  -OR- a mix of veggies
1 Lime

~In a blender add 1/2 of the chili (you can always add more), and everything but the green veggies.  Blend until it is a fine consistency, you can always taste and add more liquid if needed.

~Steam green veggies until tender crisp.

~Serve veggies with sauce either onto or on the side.

~Enjoy!

Banana Bread

I have, on occasion, made a great recipe and lose it.  It is horrible to make something so good and not be able to make it again because I can't for the life of me follow the convoluted way that took me to the recipe.  So I am going to attempt again to start storing my recipes that I make or use and store them in a place that I can easily find.  

This recipe was found via the comments section at the front of the April issue of Canadian Living.  The comments section was filled with rave review of The Ultimate Banana Bread, so I had to try it.  It turned out beautifully crunchy on the outside but soft and tender on the inside.  I did add the chocolate chips because why would you leave them out, so delicious.  

I made this and it was so good that it didn't last long enough to get pictures.  I will post some pictures when I make it again. 

The Ultimate Banana Bread
Recipe from Canadian Living, March 2014

3 ripe Bananas, mashed
1/2 cup Buttermilk*
1 1/2 tsp Baking Soda
2 1/4 cups AP Flour
1 1/2 tsp Baking Powder
1/4 tsp Salt
3/4 cup Butter, softened
1 cup packed Brown Sugar
1 Egg
1 tsp Vanilla Extract
1 cup semi sweet chocolate chips (Optional, well, sort of :)

~Preheat oven to 350F and line a 9" x 5" loaf pan

~In a small bowl add bananas, buttermilk and baking soda and let sit for 5 minutes. *I used dried buttermilk powder and reconstituted it according to the directions since I never have buttermilk in the house and I am not one to pre plan for the things I want to bake, thusly buttermilk powder*

~In a small bowl mix together flour, baking powder and salt.  If adding chocolate chip, and why wouldn't you, this would be the time to add them to the flour mixture.

~In a large mixing bowl, cream together the butter and brown sugar.  You can do this with a mixer or a kitchenaid but I was too lazy to haul it out of the cupboard.

~To the butter/sugar mixture add the egg, vanilla and banana mixture.  Once the wet are all combined add the flour and chocolate chip mixture and mixture until just combined.

~Pour into the prepared pan.

~Bake 60 to 70 minutes or until a toothpick comes out clean.  Let cool in the pan 10-15 minutes and then turn out onto a rack to completely cool.