The yogurt making process is rather simple and I can see why you don't need a yogurt maker to make it.
Making Yogurt
You can use almost any type of milk to make yogurt, although skim milk makes a thin and a little grainy yogurt. I would suggest using whole or 2% milk to start and if you want try 1% or skim milk. You can always add a package of gelatin to the warmed milk to make a firmer yogurt.
1 For every liter of milk your cooking you'll need 2 tbsp of yogurt, either from a previous batch or from commercially produced yogurt (preferably, live culture and plain. You could probably use flavoured as well, I haven't so I don't really know). 1a) Start by taking out your yogurt (I used approximately 2 tbsp for every liter of milk) and let it come to room temp on the counter while you do all the other stuff. Cold buggies don't do a lot, but warm ones are great for making yogurt. 1b) Also, turn on your oven light to warm up the oven just a bit.
2 heating milk in a sauce pan on low to 180-190 degrees F. There is where a digital thermometer is very helpful (and even butter when you turn the alarm on, but I'll get back to that later.
3 Once the milk has been heat to 180 or so, then let the milk cool to 110F.
4 Then add your room temp yogurt and mix with a whisk to get everything mixed well and then pour into a warmed glass jar, cover and wrap with a towel.
5 Place in the oven, wrapped in the towel, and let sit for 6-10 hours. The amount of time that is required to culture the yogurt depends on how you like your yogurt. I let mine sit for 6 hours this time which leaves the yogurt mellower and thinner. Essentially the shorter the time the yogurt is left to mature the mellower and thinner the resulting product. The longer the time you leave it the tangier and thicker the product. It will also get tangier in the refrigerator since there aren't any of the commercial preservatives or stabilizers.
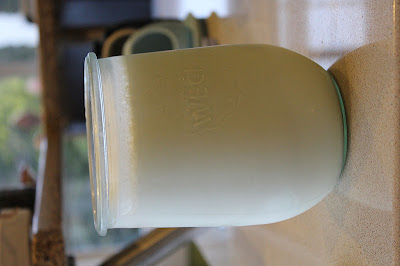
Here is my new additions. Yogurt and a new Weck Tulip 1L jar. I have been ogling Weck jars for years but they aren't available locally but I did find a place in Vancouver that were selling them, so I picked up 2 - 1L jars.
I had a taste of it to make sure that it was good, and it was. That liquid is the whey that always comes out when you disturb the protein strands.
Final Notes:
~I got a migraine in the middle of the process of heating the yogurt and I hadn't turned on the temp alarm on my digital thermometer, so I didn't catch it until it made it to 215F, I let it cool to 110F and followed the rest of the directions. Still tasty and yogurty :)
~If you like greek yogurt, then once the yogurt has set, spoon the yogurt into a fine mesh strainer or a strainer lined with cheese cloth over a bowl and let all that drain in the fridge overnight or until it is as thick as you like. The whey is yellow-green liquid in the bowl which is full of riboflavin and is apparently a nice drink with a bit of sugar or salt.
~If you want fruit flavoured or honey yogurt, you can blend up some fruit and mix it in the yogurt once it has cultured in the oven. I haven't tried this but I think I might try some honey yogurt since this is the kids favorite. I might also try adding the honey to the warm milk rather then to the cultured yogurt, but I don't know if that will work as well as I want it too, I guess I will have to try :)
~If your interested in using a slow-cooker then try this article. I haven't tried it but it looks interesting.


No comments:
Post a Comment